Are you tired of dealing with stagnant air and fumes lingering in your garage? Installing a high-quality exhaust fan can transform your workspace into a comfortable and safe environment. In this comprehensive guide, we’ll walk you through the step-by-step garage exhaust fan installation process, ensuring optimal ventilation and air quality for your garage. Whether you’re a seasoned DIY enthusiast or a novice, this guide will help equip you with the knowledge and skills to tackle this project confidently.
Step 1: Assessing Your Garage’s Ventilation Needs
Before diving into the installation process, assessing your garage’s ventilation requirements is crucial. Consider factors such as the size of your garage, the type of activities performed inside, and any existing ventilation systems. This initial evaluation will help determine the appropriate size and capacity of the exhaust fan needed to ventilate your space effectively.
Choosing the Right Exhaust Fan
Selecting the right exhaust fan is paramount to achieving optimal ventilation in your garage. Look for a fan specifically designed for garage environments, with features such as high airflow capacity, durable construction, and energy efficiency.
Here’s a highly reviewed 16″ Metal Shutter Exhaust Fan that we have selected for this guide
This model does not require wiring since it plugs directly into an outlet. Make sure you have a wireless switch available so you can activate it from the other side of the garage.
Check Out This Best Selling Wireless Wall Switch
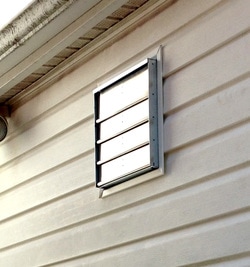
We have selected a 14″ aluminum shutter vent for the exterior wall.
Step 2: Gather your tools
The following materials will be needed for garage exhaust fan installation:
- Mounting bolts and screws
- Sealant or Caulk
- Regular Screwdriver Set
- Wireless switch
- Shutter vent
- Flashing tape
- Siding removal tool
Step 3: Preparing Your Garage for Installation
Prepare your garage for the installation by clearing out any clutter and ensuring a clean and accessible workspace. Locate the ideal spot for mounting the exhaust fan, taking into account factors such as proximity to electrical outlets and optimal airflow. Mark the mounting location and ensure it’s free from any obstructions.
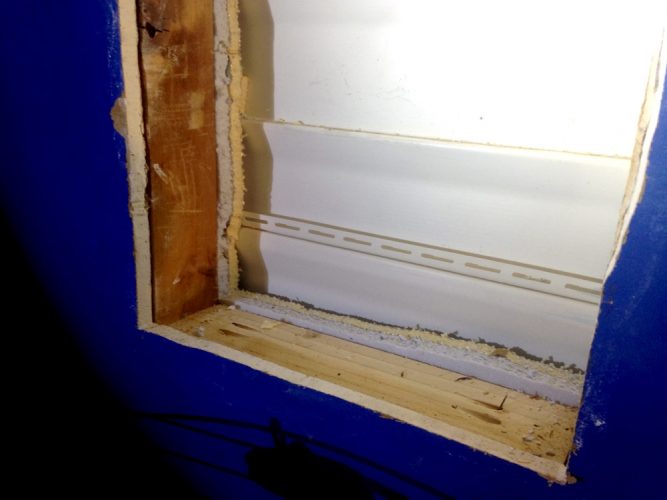
Step 4: Cut a Hole & Seal the Edges
Once you have decided where to install your fan, cut a 14″ x 14″ hole in the area.
The next step is to seal the hole’s top and bottom edges with Sealant or Caulk.
This Gorilla Waterproof Caulk Below Is A Best Seller On Amazon
Make sure you do not leave any insulation in the hole, as it may cause a fire. Then, cut two 2x4s and insert them into the top and bottom. Use pocket hole screws to attach them to the wall studs.
The 2x4s can be made easier to maneuver by putting temporary hooks on them.
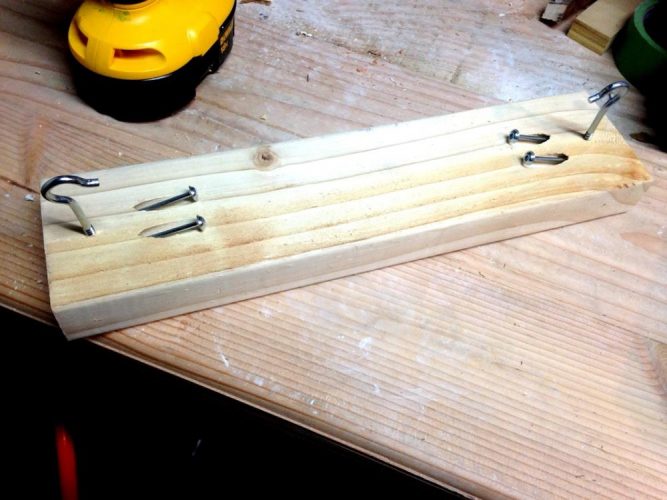
Here is a picture of the 2x4s sealed into the bottom of the hole:
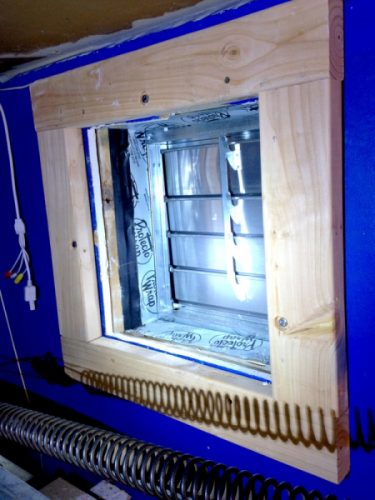
Step 5: Construct A Vent Frame (J Channel Frame)
After cutting a hole in the wall, make sure that the exterior side is waterproof. To prevent water from penetrating the siding, J channels need to be installed. A frame can be built around the vent, overlapping the siding and protecting the edges. The following picture shows four pieces of J channel cut to create the vent frame:
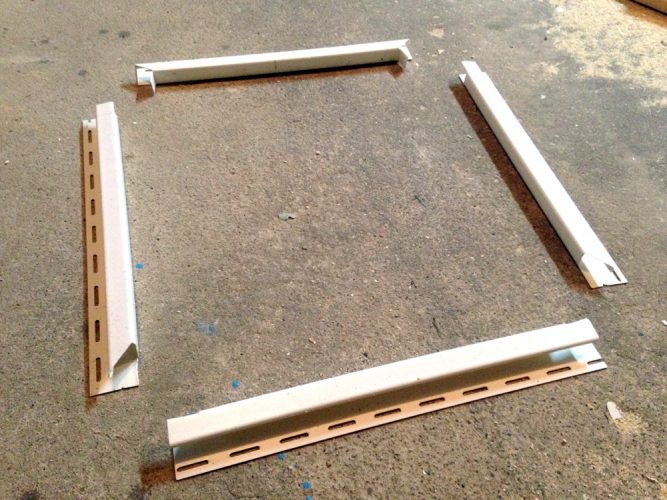
Make a square by cutting the pieces to size and nailing the ends together.
Step 6: Preparing The Sidings
The exterior vent must be installed under the siding, which requires several pieces of siding to be removed. A siding removal tool makes it easy to remove siding from walls.
Here’s An Overall-Pick Siding Removal Tool On Amazon
As a result, you will be able to continue working on the hole. You will need to seal the hole’s edges with some flashing tape to waterproof it.
Step 7: Construct A J Channel Frame For The Garage Vent
The shutter vent should then be inserted and nailed to the wall studs. You can buy a shutter vent separately if your model does not come with one.
This Shutter Vent Is Highly Rated On Amazon
After that, attach the J channel frame.
This is how the vent will look from the inside:

Step 8: Construct A Wooden Frame Spacer To Install The Exhaust Fan
You will then need to construct a framed wooden spacer for the garage wall exhaust fan.
The exhaust fan will need enough distance from the hole for the shutters to function properly, so you’ll need to build a 2x4s wooden frame between the wall and the fan.
Use the miter saw to cut some 2x4s to length. Using pocket hole screws, attach them to form a frame.
Below is an image of the garage wall exhaust fan frame:
Finally, the exhaust fan is mounted on the wall. Attach the fan to the 2x4s frame and make sure the shutters open and close freely. Use heavy-duty screws to attach the fan to the 2x4s frame. The picture below shows a mounted garage wall exhaust fan (powered on) from the inside:

Check Out This Video On Youtube That Explains The Process Of Installing An Exhaust Fan In The Garage
FAQs
1- Is it worth investing in a garage fan?
In order to improve your garage’s ventilation, you might benefit from installing a garage exhaust fan if it’s humid, hot, and uncomfortable. The system will help you get rid of moisture, heat, and airborne allergens and improve the quality and comfort of your garage’s air.
2- How many vents should I have for my garage?
As a general rule of thumb, if the attic has a vapor barrier, one vent per 300 square feet of attic area is recommended. Otherwise, every 150 square feet should have one vent.
3- What causes my garage to become so hot in the summer?
In the summer, garages feel like saunas for two main reasons. Firstly, there is a lack of ventilation, and secondly, there is a lack of insulation. By installing an exhaust fan in the garage, you will be able to solve this issue and keep the garage cool and ventilated.
Final Thoughts
By following this comprehensive guide, you can successfully install a garage exhaust fan to improve air quality and ventilation in your workspace. Remember to prioritize safety throughout installation and consult professional help if needed. With proper installation and maintenance, your garage exhaust fan will provide years of reliable service, creating a more comfortable and enjoyable environment for all your projects.
Hopefully, this guide at Whatfans.com will assist you in installing an exhaust fan in the garage.
Check Out WhatFans Other Articles & Reviews below –
Top 5 Solar Powered Exhaust Fans For Shed – Buyers Guide